Making footage look average is simple. You just throw some lights up, you shoot in the thirds, and you throw some contrast on it. Making footage amazing is hard. I’m going to show you how to fix by that by using LUTs for premiere.
But making footage look amazing is hard. It takes lots of preplanning, lots of time, and lots of different skill sets. It takes correct technical settings, great lighting, and skilled post-production.
There’s a lot that goes into creating great footage. Today I’m only going to hit on the post-production side. Color grading. This is how to use LUTs for Premiere.
How to Use LUTs for Premiere
For the sake of time, let’s assume you already have decently lit footage. Now let’s talk about color grading. When I first started out, color grading was the thing I spent the most time on. I would spend hours in Final Cut pushing colors, adjusting highlights and shadows. I was obsessed with trying to match my footage to look like films I enjoyed.
Over the past few years I’ve learned that subtle color grading is much more effective than slamming contrast on all of your footage.
I’ve also been using LUTs for premiere to help establish a grade much quicker on my flat footage.
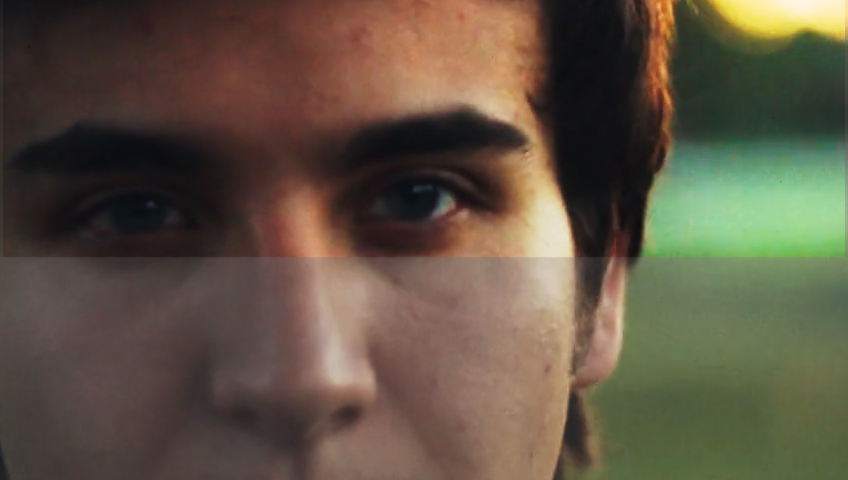
LUTs (lookup tables) are an amazing tool then that can help your footage go from average to excellent. If you know how to use them correctly.
Here’s a quick explanation if you want to know more:
What Is A LUT? Explained with Cats. from Ground Control on Vimeo.
Using a LUT is extremely simple, almost too simple. It sometimes feels like I’m cheating when I apply a LUT to my footage. But the results are great, assuming you shot in lit you’re seeing correctly.
Today I’m gonna show you how to apply LUTs for Premiere Pro. Keep reading and let me break down exactly how you can start downloading LUTs and putting them on your footage.
First, go to effects and find Lumetri Color.
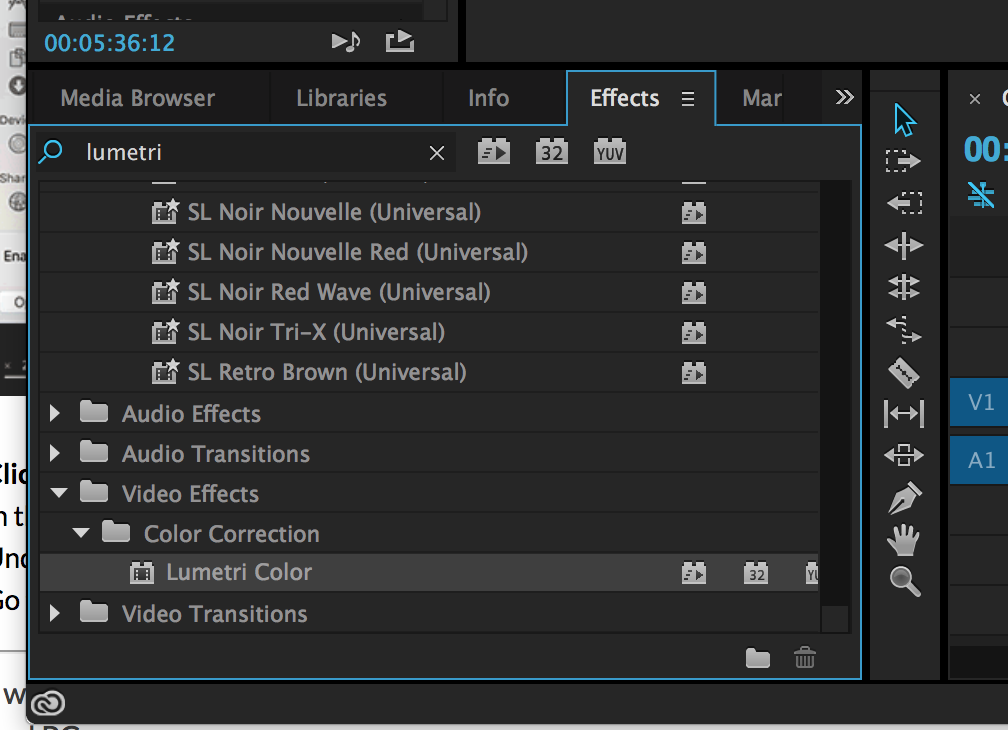
Drag this effect on the clip you want to apply the LUT.
Next, go up to the effect. Click the arrow to see more “Basic Correction” options.
In here you can now select “Input LUT” and choose one!
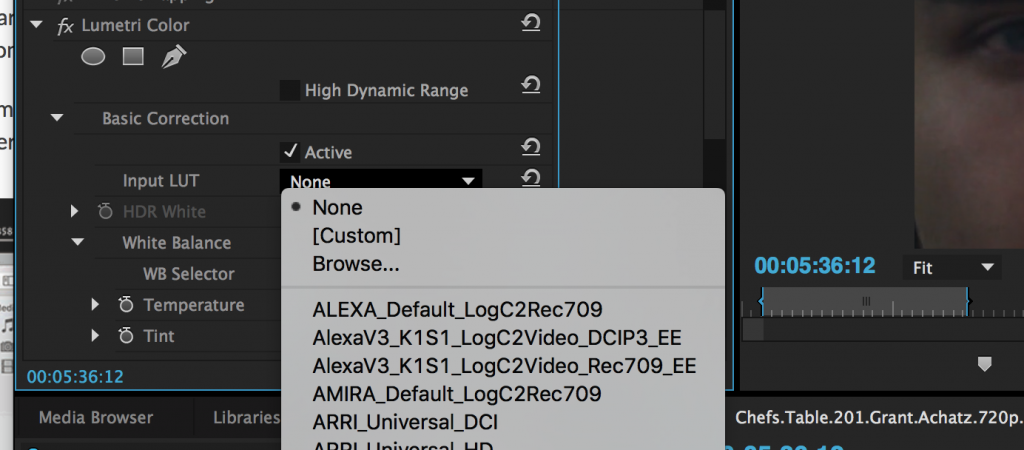
Lumetri has LUTs already built in here. But it’s also a place where you can import LUTs.
Just hit “Browse…” find the LUT that you downloaded and bada-bing. You’re good to go!
What if the LUT is too powerful?
I run into this problem a lot. Some of the LUTs I use look awesome, but they tend to be a bit to contrasty / saturated for my image.
Here’s a simple way to fix that.
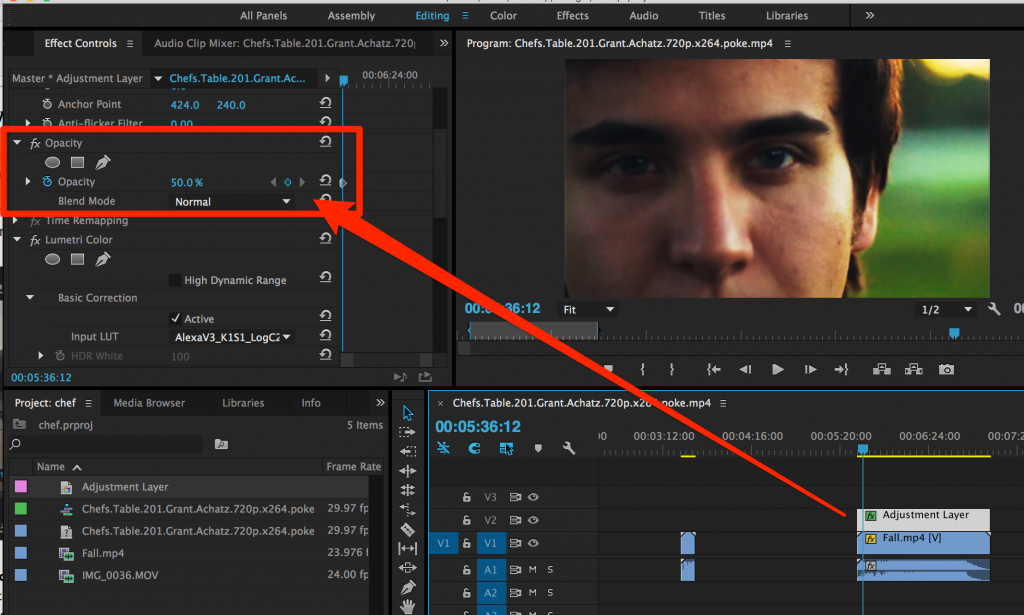
Instead of dragging the “Lumetri Color” effect on your clip directly, you’re going to create an Adjustment layer. Go to “File > New > Adjustment Layer.” Make sure you ‘Project folder’ is selected or else it won’t let you create the layer (lame Premiere).
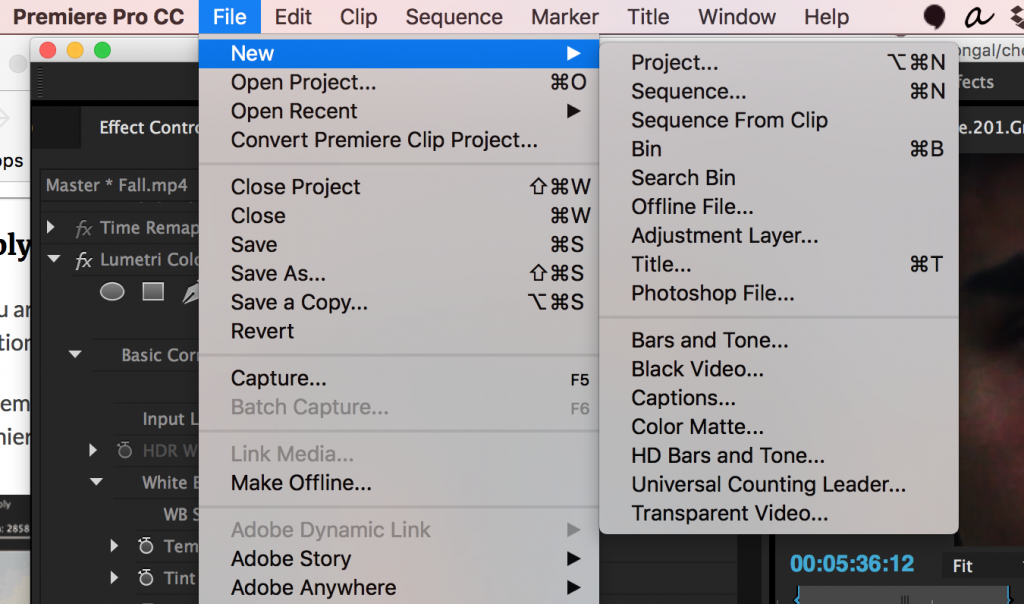
Now that it’s made, drag this adjustment layer over the clip / clips you want the LUTs for premiere on.
Apply the “Lumetri Color” to the adjustment layer. Run through the steps above to apply the LUT.
Here’s where it gets spicy.
Go to the Adjustment layer’s opacity, and start to lower it.
This will lessen the intensity of the clip on your footage.
Boom.
Now you know how to use LUTs for premiere thanks to this article.
Now where do you find LUTs for premiere? You’re in luck.
I’m going to be releasing 5 of my LUTs next week. Put your name and email in and I’ll send the LUTs right to your inbox:
Enter Your Name and Email and I’ll send you these 5 LUTs next week!
You can also google LUTs and find a bajillion of them.

Leave a Reply