Lighting is key to your success as a filmmaker. You can completely change the look of something by how you let light hit it. Here are 3 selfies I took within a matter of seconds. The only thing that changed was how the light hit me. Lighting in film isn’t as hard as we make it.
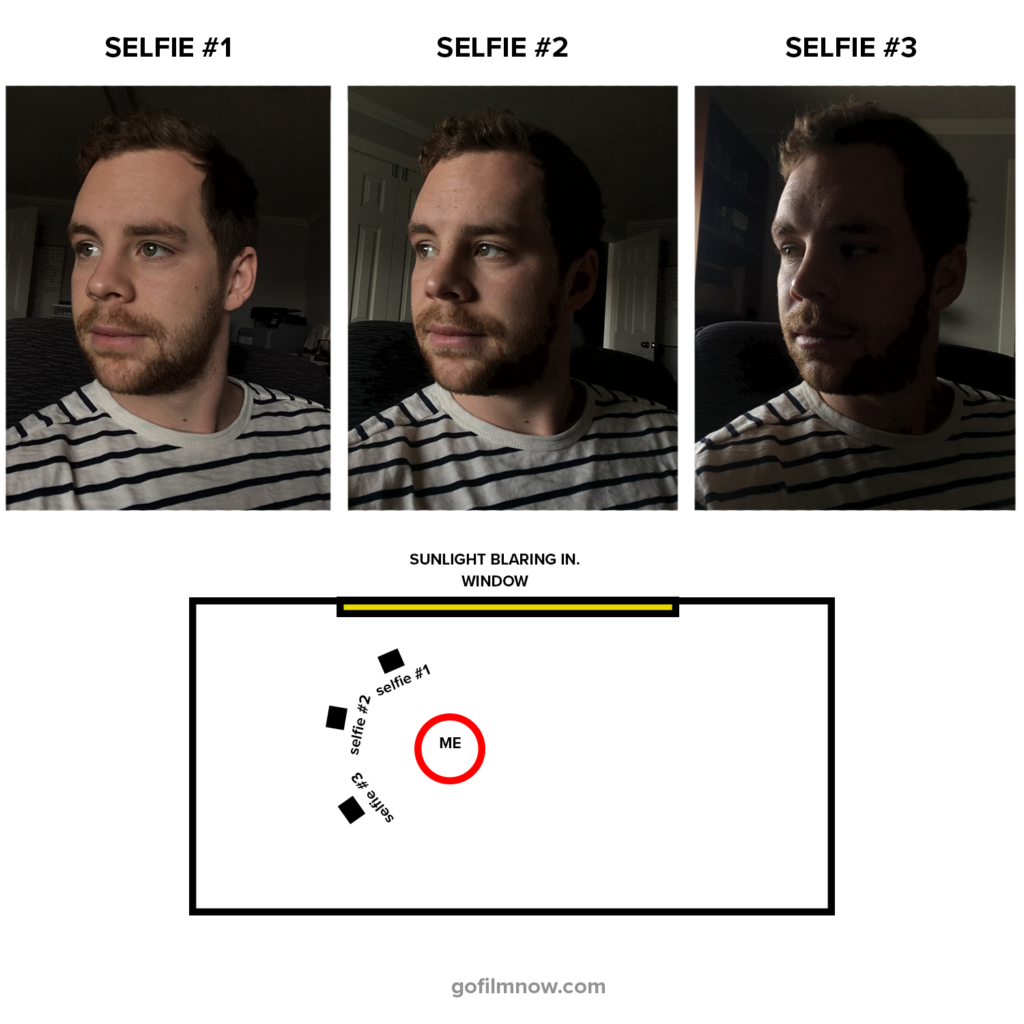
I’ll dive more into that at the bottom.
“My Films Should Look Great, But They Don’t”
You start to shoot something – the location looks awesome, the script is great, and the actor is ready. You start to film and look at your monitor – the exposure looks good, white balance, check and you hit record. When you get to the editing room though, the stuff you shot looks like a bad sitcom. You’re trying to communicate drama and tension, but the stuff your filming looks like something from your local news channel. It doesn’t look like hollywood films, it doesn’t look dramatic, it doesn’t have any feeling at all. Even your dark gritty grade in post-production doesn’t help. It honestly makes it look cheesier. It’s not what you want to do when lighting in film.
You might write it off as ‘not shooting on a RED Epic’ or some other lame excuse. That’s not the case. Your problem is lighting. You are lighting everything wrong. Nobody is watching your films because they are cheesy and lame – but honestly it’s just a lighting issue.
Stop Complaining, Start Learning
You might be thinking: “but Chris, I don’t have any money to buy lights.”
Or: “I don’t know how to use lights.”
I’ll jump more into these concerns down at the bottom. They are weak.
Lighting Can Become Second Nature
Imagine this. Actually being able to film your subjects and put out films that have ‘feeling’ to them. Even while you’re filming, you’ll look at the monitor and say, “this looks amazing.” You’ll be excited to get your footage into that timeline when you get home. This ‘look’ I’m talking about and people love it. It’s cinematic, it’s dramatic, it’s beautiful.
There’s no better feeling than posting something on Vimeo or Youtube knowing that ‘this look’ is going to suck people in.
Imagine being able to walk into a room and achieve this ‘look’ within 30 seconds. I’m talking almost any room too. This will even change the way you start to take selfies. I’m by no means a lighting expert. But hopefully the stuff I’ve learned can help catch you up to speed. Or even tell you principles you already know, but just needed a good reminder / kick in the butt!
So how do you use light to create a cinematic look? Before we jump into which lights to rent and purchase – the difference between LED vs Tungsten, let’s first start with light everyone has. Let’s jump into natural light. Using natural light is key to lighting in film.
Natural Light is Your Best Friend
If you can figure out how to use natural light, you can figure out how to use any light.
Anytime you walk into a room, 90% of the biggest light in the room (assuming it’s daytime) is going to be window light. That’s where we want to focus.
This window light is key and unfortunately you can’t move it. You have to use it as your key (remember, we’re not using any external lights, we’re forcing ourselves to use natural light).
So how do we effect our look if we can’t control our main light? There is one variable we can control. That’s where we put the camera.
If You Can’t Move the Light, Move the Camera
Where you put the camera in contrast to the light can dramatically effect how your film looks and how your subject looks.
Here’s your goal, you want to create a shadow side and a lighter side. Here are some dialogue images below from movies. I’ve noted the shadow side and lighter side. What you’ll notice is that the light is always shining on the smaller side. This gives us an idea of where we want to place the light. This can help you achieve cinematic light.
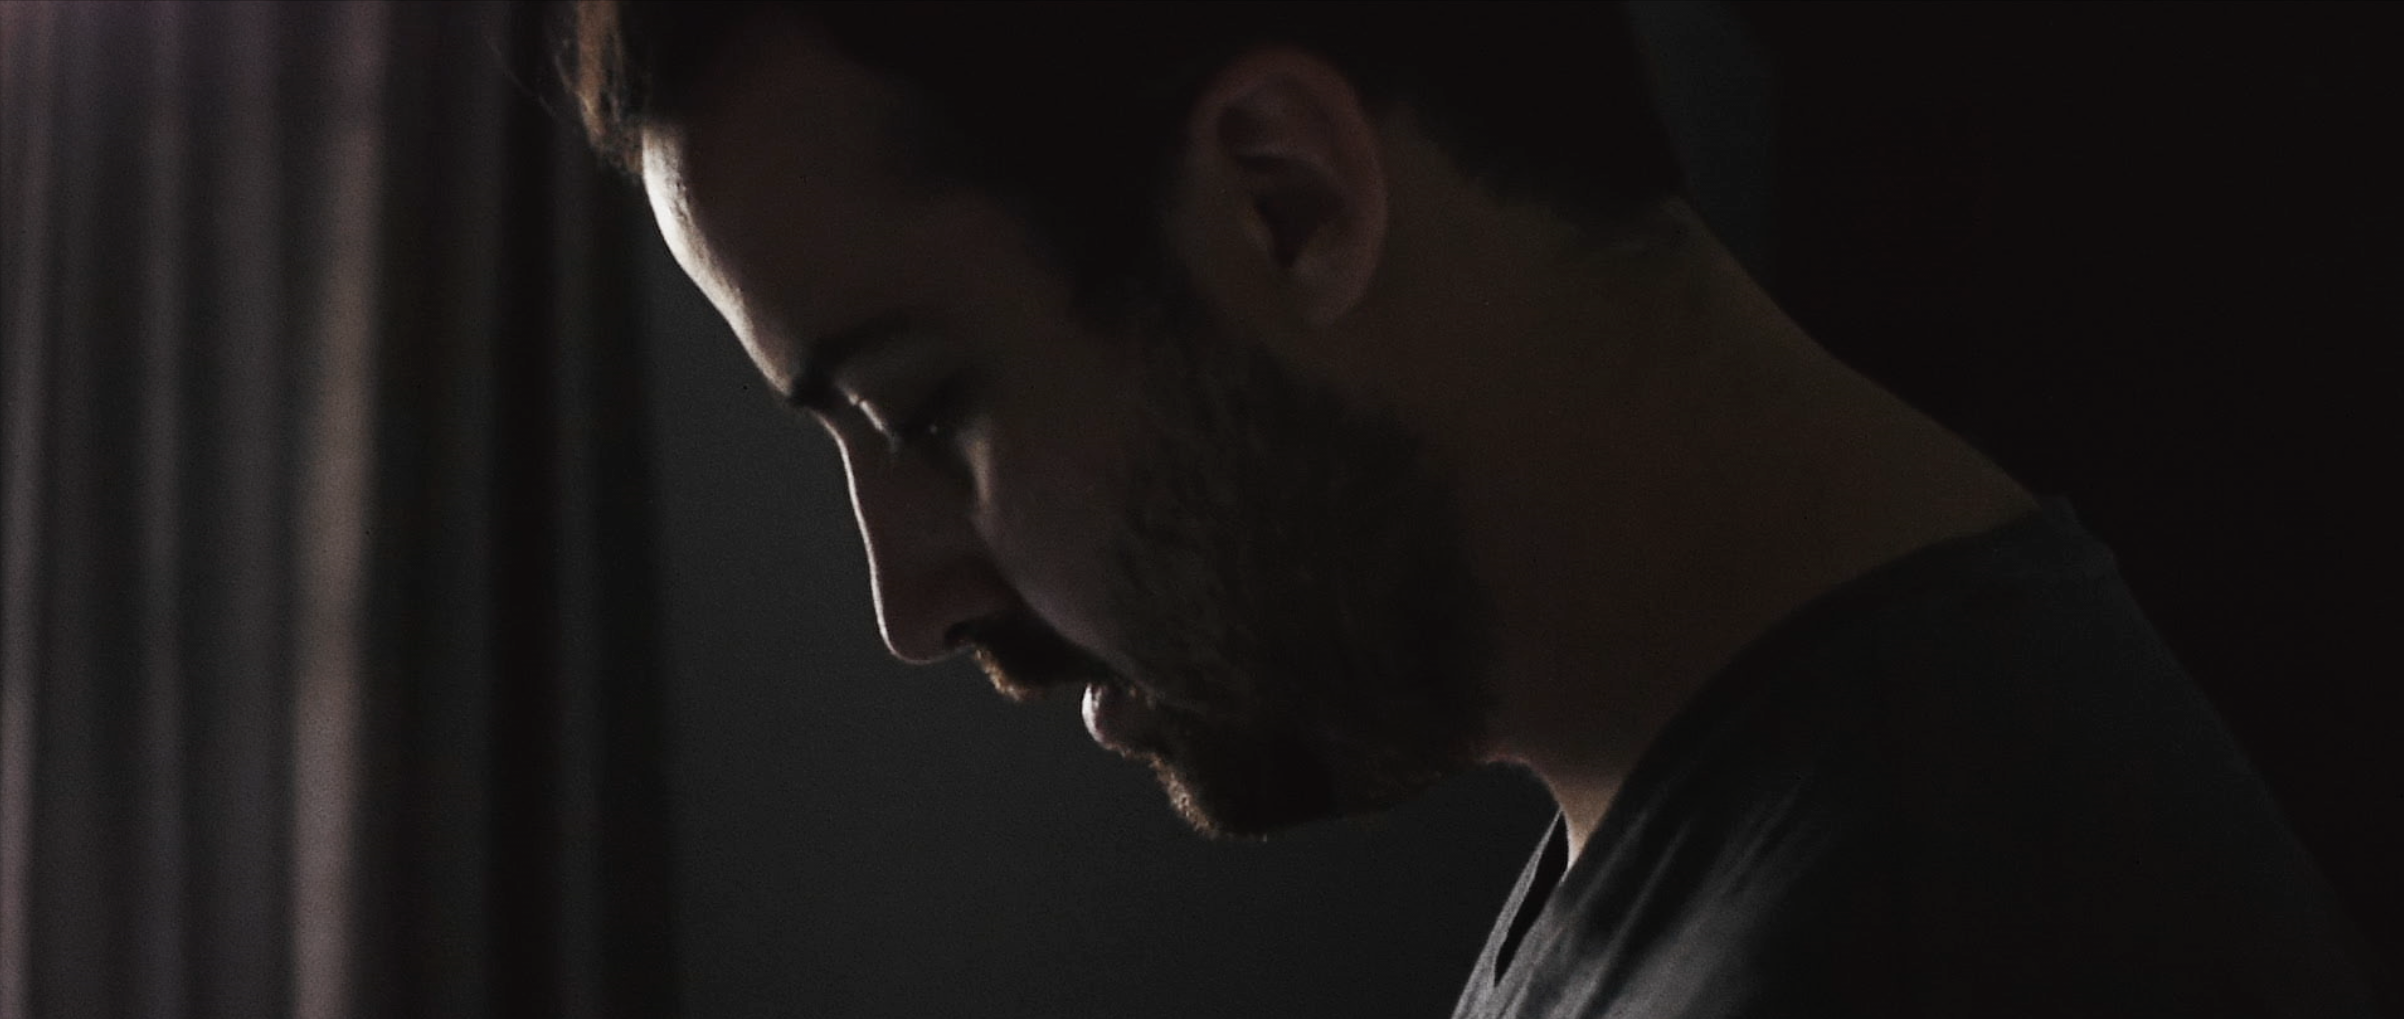
Below are some examples of drama that’s created. Ranging from side light (least dramatic) to a more backlight shot (most dramatic).
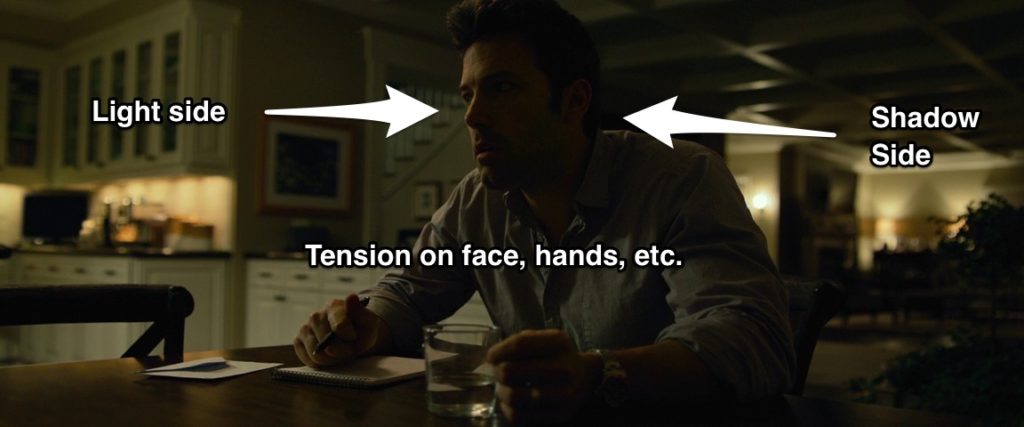
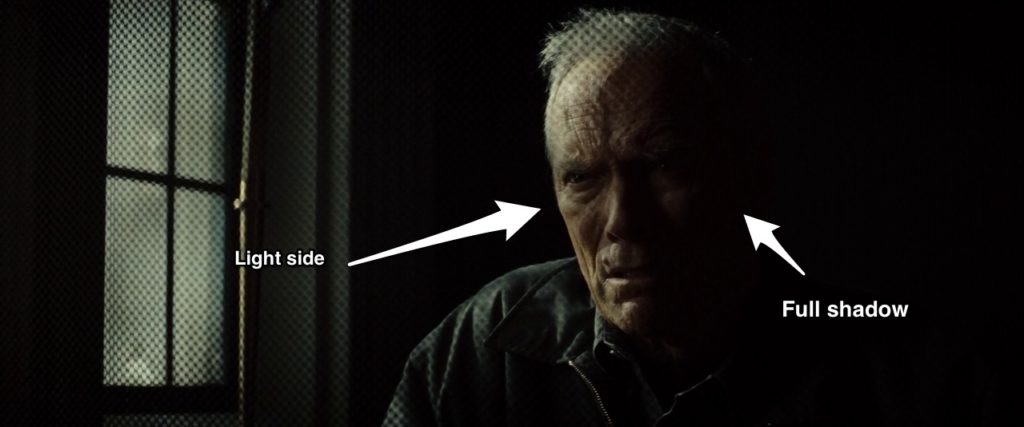
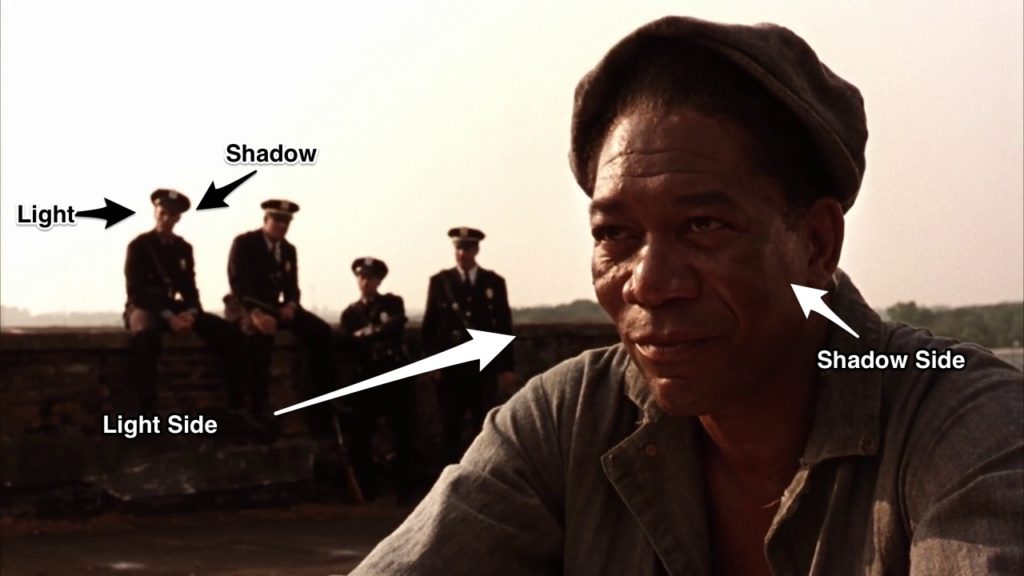
As you start watching more TV shows and films you’ll start noticing this style of tension created with lighting. This light side, dark side is huge for cinema because it communicates drama and depth. For news shows and interviews you’ll see flat front lighting sometimes. This is less dramatic and more corporate. But if you’re shooting films you have to create tension with you light!
So How do I do it?
How do I apply this? When you walk in a room find the biggest window, the biggest light source. Backlight your subject with this light source. Start as dramatic as possible. Then start to swivel your camera position around until you reach a dramatic look that you’re happy with. This seems so simple, but it’s been a game changer for effecting the way my films look.
Here’s an excercise. I literally took these selfies in my chair with my iPhone. Each image, I just swiveled my chair a bit in contrast to the light. You can see how big a difference camera placement makes in dramatic imagery.

Pull out your phone right now. Open up snapchat or your camera app. Go up to a window. Put the selfie mode on. Start swiveling around the room slowly, you’ll notice what looks more dramatic and what looks ‘flat and boring.’
What now?
If you found this article helpful at all, CLICK HERE and tweet it this film article out to your friends.

Leave a Reply