
“That Skin Looks Horrible”
You import your footage, pull it up in Premiere. You start sorting through some exterior footage and things are looking epic. Finally you get to some clips with people in it. The skin tones suck. You want to know how to get good skin tones but… The skin of your actor is so magenta it looks like they are a pink elephant. Or worse, they’re greener than a frog.
How to get good skin tones?
Skin tones that look like garbage. This is a problem I’ve run into over and over again. Especially when I’m shooting an interview and the person is the focal point of my video. Crappy skin tones can ruin the entire video for me.
My Skin Tones Don’t Look Like Hollywood
Even when my skin tones looked ‘OK,’ compared to Hollywood films I was always left disappointed. Hollywood films have this crisp tone that match from scene to scene. My colors were all over the place.
While working on short narrative films, getting good skin tones that matched was even tougher. I’d be dealing with different footage, from different locations, with completely different lighting setups. Even with correct exposure and white balance the skin of the actors looked dull in some scenes and bright in others.
For me, I didn’t want to download resolve and pay (the free version doesn’t support 4k). So I thought that I would be stuck with these tones. Fixing those tones was the next step to take my films from looking ‘amateur’ to ‘expert.’
My Multiple Camera Interviews Looked Trashy
The worst experience I’ve had with skin tones is when I use multiple cameras in interview settings. I remember shooting on a Sony FS700 as my main camera, then I had a close up side angle with a Canon 7D. Talk about tough color profiles to match in post-production.
I’d import the footage and cringe at the green skin of the FS700 and the magenta skin of the 7D. This is not how to get good skin tones.
I’d pull up some curves and even apply a LUT. Generally though, this would reveal how off my skin tones truly were.
How Can I Save Skin Tones After Adding a ‘Look’
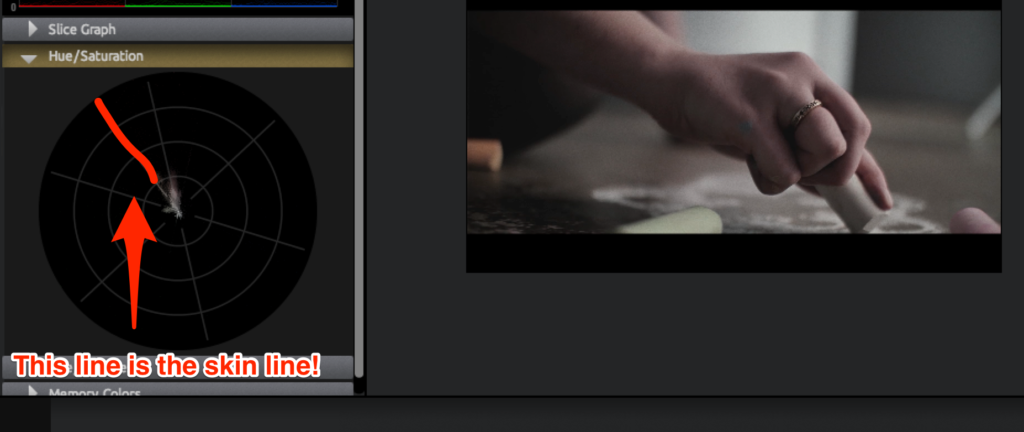
If you know nothing about skin tones, you should know they naturally exist at the following line in the scopes here:
The problem I ran into is I’d start to adjust my skin tones to this line using curves, but it would end up ruining the ‘look’ I was trying to go for.
I agree that curves, levels, and brightness/contrast are part of the necessary tools. But there is one tool that has helped me immensely over the years.
How to Adjust Skin Tones Only
The best way to achieve great skin tones is to make sure you balance all your cameras. This means matching up color temps, exposure, etc. But as we talked about before, we don’t live in a perfect world. So let me introduce you to the magic tool I use and how to get good skin tones.
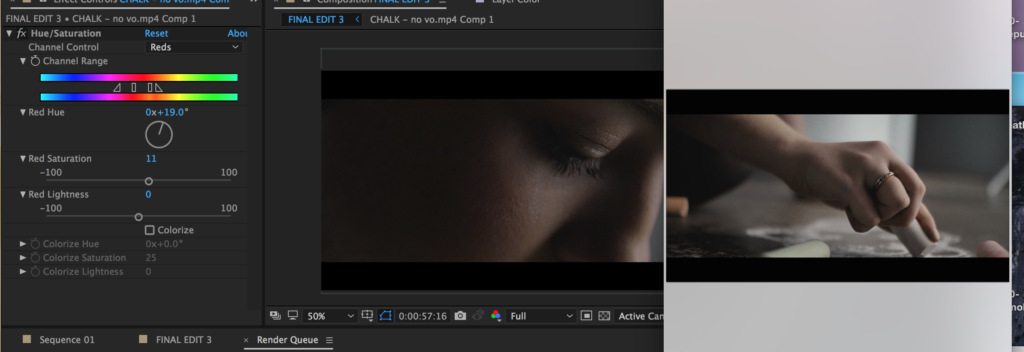
It’s the HSL (Hue / Saturation) tool. You can use this to adjust colors in a variety of color grading softwares including Resolve. It also works in editing programs like Premiere and After Effects too.
*** In Premiere: Use HSL Secondary controls in the Lumetri Color panel! ***
Let me breakdown how I use it to adjust, match, and fix JUST my skin tones.
First, you want to use both your scopes. Or pull up a reference image with skin tones you adore.
For the reference image try to find one with an actress that has a similar skin color as your person. This is key in how to get good skin tones.
Now apply the Hue / Saturation / Luminance (HSL) tool to your first clip.

Let me break down what these terms mean.
Hue: the color / shade
Saturation: intensity of color
Luminance: intensity of light
What’s so powerful about the HSL tool is you can tweak specific color ranges. So you can grab all the reds in your footage and saturation so it’s extremely intense (150 saturation), or remove the red entirely (0 saturation).
We’re going to use the red / orange hue to effect our skin tones the most.
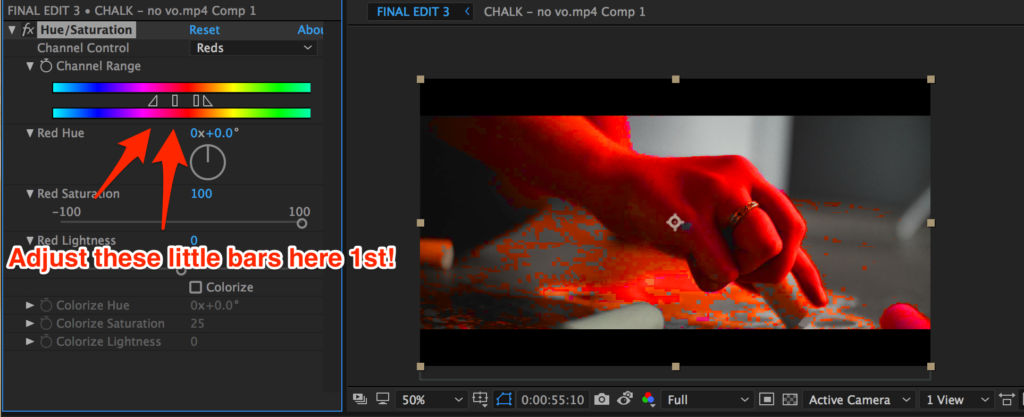
First we need to adjust our color range. Select red / orange from the preset. Now bump up the Saturation to +100 so you can see what colors in your frame are selected. Now adjust the color range and try to only select the skin tones.
Now that your skin is selected you can lower the saturation back to normal.
Now It’s Time for the Hue
Next you can start to adjust the HUE. The trick here is to go hard then reel it back in slowly.
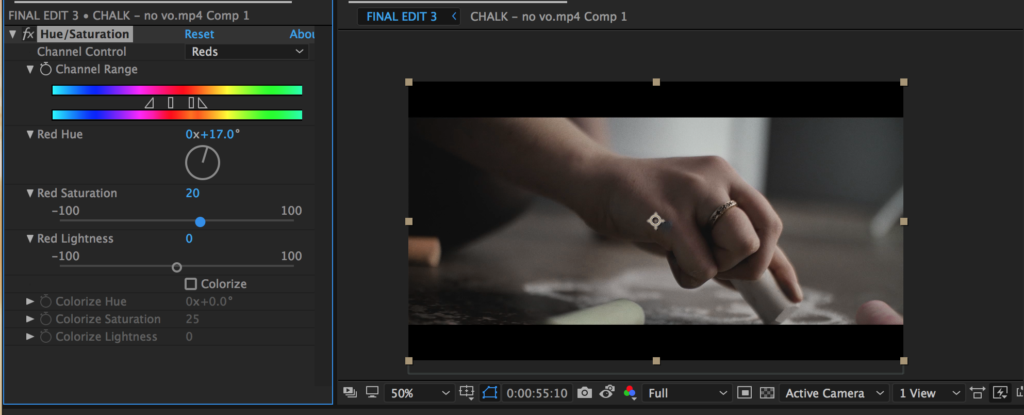
Adjust the skin tones until it matches the scope or the reference image of your choosing. Keep in mind the scope is the natural spot for skin tones. But it’s possible you want you footage to be stylized, or a unique light is hitting your subject. You can use HSL to adjust all this.

VS
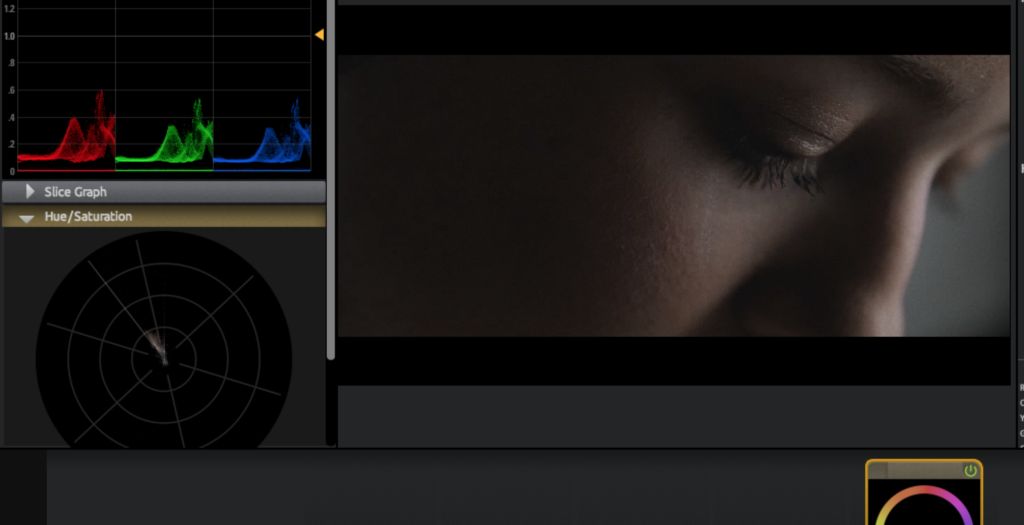
This adjusted one ^ is closer to the skin line!
The cool thing about the HSL tool is you can match your skin tones throughout and make them consistent. Once you’ve finished your first clip, you can export a screen grab and use this as your new reference. Now rinse and repeat these steps with your following clips. You’ll have a consistent skin tone throughout. This is how to get good skin tones.
Use the HSL Tool to Match More Than Just Skin
You can also use this technique to match different camera skin tones. And with HSL you can match more than skin tones. You can use it to hone in your entire color palette.
Here’s some famous film color palettes from hollywood films you can try to achieve with the HSL.
What now?
I want to give you the 10 film reference images that I generally use to eyeball skin (along with scopes). First CLICK HERE to tweet this article out if you found it helpful. Then download the 10 skin images below!

Leave a Reply